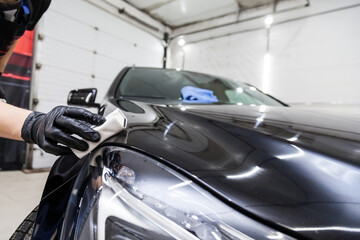
Nothing dampens the aesthetics of your car quite like a scratch or paint chips. Your precious vehicle doesn’t just lose its aesthetic value but the damage also has a detrimental effect on its resale value. So how do you treat paint chips (that are pretty common)?
Yes, you can take your car to a certified mechanic if you don’t have time to DIY, but are there other more cost-effective methods available? Can you repair chip paint on your car by yourself?
Though it may sound like a lot of work, but with the right equipment and a little bit of patience, you can easily remove paint chips on your car without any professional help.
We’ll help you with the steps to remove chip paint from your car yourself and keep your ride shiny and impressive.
Removing Chip Paint
Deep scratches often accompany chipped paint. Sometimes, these scratches are too stubborn to be buffed out with a simple paint touch-up; you need to do more than that.
If you want to repair the damage caused by chipped paint, simply hiding it with more paint won’t suffice. In case of deep scratches, you may have to repaint the whole panel together. That includes three coating layers of primer, base coat, and top coat.
Let each one dry out before applying the rest. Wait for each coat to dry out before applying the next.
But getting back on track, how do you fix minor chips and paint scratches? Keep reading to know.
How Much Does it Cost to Repair a Paint Chip on Your Car?
When you take your car to a professional mechanic, even for the smallest chips or paint scratches, it may end up costing you a few hundred dollars. That’s because you need to pay for the cost of the whole paint kit, regardless of how small or large the chipped area is.
However, there’s good news in store for you. With just a little effort, you can fix your damaged paint for as little as $100. Moreover, with precise care and maintenance, your repair work won’t be noticeable as well. That’s right; you can treat your car professionally with the right guidance.
What Materials Do You Need for Repairing Chip Paint?
Before you get started on doctoring your car, you need a few essential things. They’re:
- A Primer
- A base coat that matches your car’s paint
- Clear coat
- Grease remover
- Masking tape
- Grit dry sandpaper
- Wet and dry sandpaper
- Dry and clean clothes of towels
Steps to Remove Chipped Paint from Car
Now that you’re all set with what’s needed let’s start with the steps to remove chipped paint from your car:
-
Prepare the Paint
Before investing in materials, you must first obtain your vehicle’s paint code, which is usually found under the bonnet in most European cars. Contact your dealer or manufacturer if you can’t find the code.
Once you have the color code, visit a local automotive store and get the paint mixed as per the specification.
-
Clean the Chipped Area
The next step is to clean out the area where the paint is chipped. Use the grease remover on a dry cloth and apply it properly to clean the area. Subsequently, use a dry towel to wipe the area dry.
-
Mask off the Area
Now get those masking tapes into action and cover the repair area. This is to ensure that the adjacent panels aren’t damaged when you’re using abrasive sandpaper. In case of sharp edges, double-tape the area in reverse.
-
Sand the Surface
Use dry sandpaper to sand the damaged part.
-
Apply the Primer
Apply multiple coats of primer on the repair area. Depending on the damage, two to three coats may suffice. Wait for each layer of coat to dry before applying the next.
Remember to shake the can thoroughly before applying.
-
Fix Imperfections
Remove the masking paper and sand the area with wet and dry sandpaper to remove surface imperfections.
-
Apply Paint
Now that you’ve taken care of the surface imperfections, apply at least three layers of base coat. Check that the area is properly covered before applying the paint. Once again, leave each coat to dry for 15-20 minutes.
-
Apply Clear Coat
Subsequently, apply the clear coat to protect the area from UV rays and to match with the original gloss finish.
-
You’re Good to Go
Once the clear coat is dry, you’re good to go. Your ride is showroom shiny once again, but ensure to take proper care and let the paint settle for at least 40-60 days before applying wax.
Conclusion
Unless you’re short on time, repairing paint chips is a fairly easy thing to achieve on your own.
However, if you’re not willing to risk it, bring your ride to the doctor’s at AutoImports of Denver. We strengthen your car’s first line of defense, the paint, against chips, fades, scratches, or any other kind of damage. We’re also specialists in taking care of your European car’s repair and maintenance.

